
How to set up a self-hosted Gitlab Runner and publish files through SFTP
Sometimes you want a small setup to use self-hosted Gitlab with your side project but still using some CI functionality. Let's see how to publish those files through SFTP.


When I wanted to use some versioning functionality when developing my main website, I naturally used Gitlab. But Gitlab does not stop at simply offering that function, it's a complete DevOps platform. While using it, why not try to use a little automation even if you're alone to work on your project.
So, because my project is small and, as stated, I'm alone on it, this article is to be taken as a light introduction to how Gitlab works with his Gitlab Runner. I'm not going to show how to do compilation or even testing. We'll simply go through how Gitlab use a specific orchestration file which is automatically executed when you do a git push to a specific branch.
How does it work?
Gitlab, like his name hint at, is a platform based around the Git protocol. But it's much more than that. It's a full-on collaborative development system for teams to work together on several projects. It shines by integrating CI/CD functionality.

What is CI/CD?
It stands for Continuous Integration and Continuous Delivery/Deployment (it's either delivery or deployment, not both because they are opposed as you're about to understand).
Continuous Integration is the part you may already know. It's the organization in branches of codes where developers commit their changes to and merge them to proceed in a full commit to the main branch. It's really what Git brings on the table on top of versioning but automated.
Continuous Delivery is the concept of automatically compiling and testing at every commit to the main branch. Once testing is complete and changes approved, the software is ready to be published. But, it doesn't mean that it is actually published, it's just considered as ready.
Continuous Deployment is like Delivery but, as his name implies, has the software automatically deployed (which delivery does not). The old revision is removed and the new one put in place. That kind of organization really goes hand in hand with micro-services through container.
For what we want in this small project, it's merely a Continuous Deployment that we're going to put in place. Indeed, we just want to push our website files to the SFTP automatically when we commit changes. No testing, no compiling, no merge, etc...
In practice
The way Gitlab executes all that automation is through a Gitlab Runner. That runner is just another machine where commands are executed on them. It could be a fully fledged computer or just a container, it doesn't really matter as long as the system has the Gitlab Runner software loaded on it and connected to the main Gitlab instance.
Runners come in three flavors:
- Specific
- Group
- Shared
I think the names are obvious but let's explain them anyway. A specific runner will be dedicated to a specific project. It's great for an active and computationally intensive project. Group and Shared Runners are shared between projects, the difference between the two is that group runners will execute tasks for a group of projects where shared runners will execute tasks for any projects set up to allow use of them.
To send those commands to the runner, Gitlab run Jobs through Pipelines. A job is just an instance of execution of a config file that contains a recipe which instruct the runner what to do. That config file has for filename .gitlab-ci.yml and it needs to be at the root of your git project. As you may have guessed, the file is written in YAML. The pipeline is the complete set of jobs create by a specific file.
Because we want something simple, I'm just going to put in place a shared runner. I don't have many projects running on my Gitlab and I'm alone to work on them so it's more than enough for me.
Set up of the Gitlab Runner
First of all, you have to install the Gitlab Runner software. I'm not going to explain how to do that because the Gitlab Docs does already a good job of that. So I'm encouraging you to check it. In my case, I installed docker prior to the runner because I'll be using it in my automation. I have it installed on an unprivileged LXC container on my Proxmox server because it was the quickest and easiest solution for me.
During the installation process, you'll be presented a list of executor and asked which to choose. If you wanna use my config as a base, you'll need docker installed and choosing it when asked.
Is it installed for you? Good, now time to go in the admin panel of your main Gitlab instance. To access it go to Menu > Admin
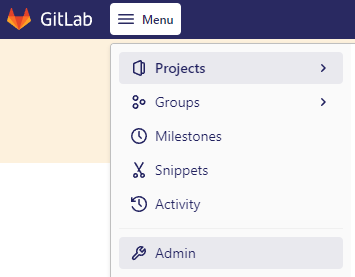
You have to be logged in with an user that has admin rights on your Gitlab to have the option available
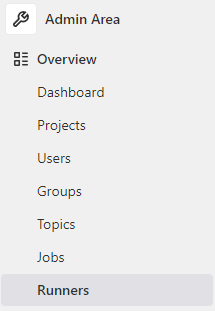
Once there, under Overview, there's the Runners admin page
Click on Register an instance runner then Show runner installation and registration instructions
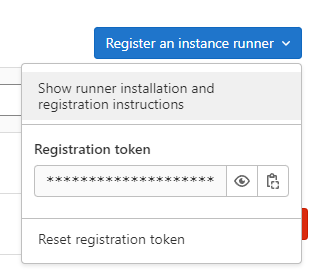
You'll be presented with a pop-up Install a runner. You'll be able to retrieve the information needed for registering your newly installed runner.
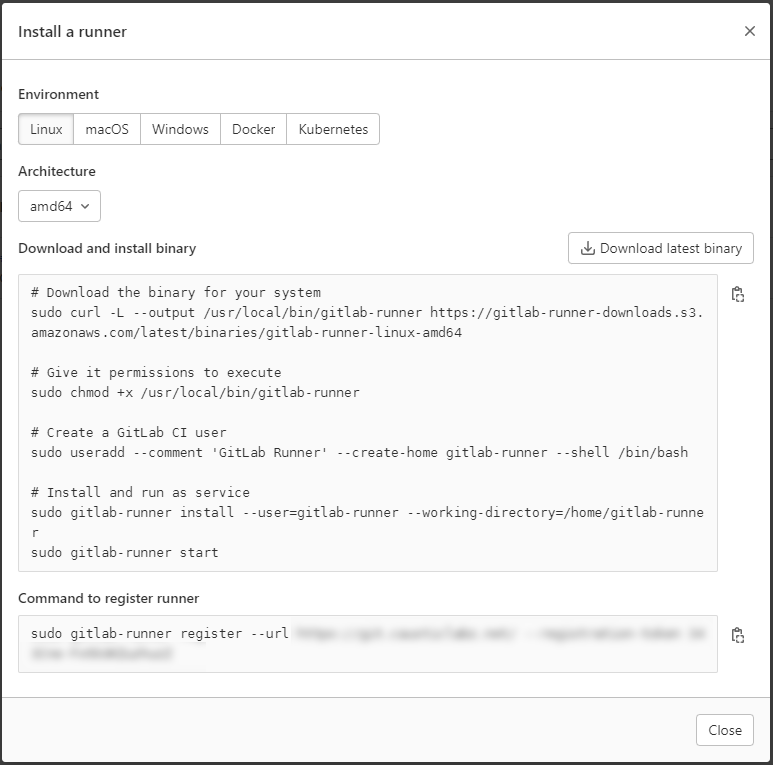
If you already have installed the Gitlab Runner software like I told you to do, you just have to look at the right environment (of course) and copying the command at the bottom. That command has to be executed on the runner machine itself.
Once done, it will appear in your Gitlab instance with the online status. By default they are set up as shared so we don't have anything more to do on that front.
Setting up CI/CD
Before we start
We have to first enable the project to use the runner. To set it up, your user needs to have maintainer or owner role on the target project, other roles can't edit the settings of a project.
So, go to your Gitlab instance, open your project then go to Settings > CI/CD. There's a section called Runners which is collapsed by default. Click on Expand. Make sure, in the right column, under the Shared runners section that Enable Shared runners for this project is enabled (like in the screenshot below).

Now, the foundation is laid to use that function.
Creating the config file
This file contains all the commands for the runner. It's written in YAML and use a specific structure. If you have played with docker in the past, you'll be in a familiar environment. Especially because we use docker in this example.
You have to create it in the root folder of your git project. The file name has to be .gitlab-ci.yml. Now, every time you push your commit, Gitlab will parse the file and act accordingly to what's in it.
Pushing files through SFTP
What we want to do is really simple compared to what a development studio would need. But, it will be a good introduction to how to use this file with some environment variables set through Gitlab.
Because we use docker, we could think of this file as a mix of a Docker Compose File and a Dockerfile. That way, we can gather the kind of info needed to successfully create this file.
First, which base image to use? I'm gonna use Alpine Linux, a small lightweight distro optimized to use in this type of environment.
Second, what commands do we want to execute to transfer the files? The easiest method is to use a software call LFTP that can handle all the transfer through a single command line. For the protocol, we'll use SFTP because it uses SSH which is already available on my test web server and I don't want to set up a complete FTP server just for testing. Sometimes, hosting provider could limit access to SFTP only so it could be useful to you.
The whole process of choosing and iterating tests to finally founding the complete script has been covered quite well by 't is goud, I encourage you to check it out.
Commands
apk add --no-cache openssh lftp
mkdir /root/.ssh
chmod 700 /root/.ssh
touch /root/.ssh/known_hosts
chmod 600 /root/.ssh/known_hosts
ssh-keyscan -p $SFTP_PORT -H $SFTP_HOST >> /root/.ssh/known_hosts
lftp -e "mirror --delete --parallel=5 --transfer-all --reverse -X .* --verbose website/ /var/www/html; bye" -u $SFTP_USER,$SFTP_PASSWORD sftp://$SFTP_HOST -p $SFTP_PORTThe first line is a command used to install OpenSSH to obtain SFTP compatibility on the local end and LFTP for obvious reasons.
The next 4 commands are used to create the know_hosts file because ssh-keyscan can't create it by itself in this context.
SSH-Keyscan is used to gather the info of the ssh server and put it to the known_hosts file. Now, no need to approve the key when first connecting to the ssh server.
LFTP will do all the transfers. It uses different parameters:
-e " "Command(s) to execute - They are placed in-between the double quotesmirrorMirror the remote folder on the local folder--deleteDelete files and folders in the destination that are not present in the source--parallel=nN number of transfer to execute in parallel--transfer-allForce the transfer of all files even if it already exist in the destination--reverseReverse the source and destination folder - the remote is now the destination-XIgnore the matching files--verboseShow all actions executedsource/folder destination/folderObviously the source and destination folders locationbyeQuit the command-u USER,PWDSpecifies the user and password to connectsftp://hostSFTP address to connect to-p PORTPort to use for the connection
Full file
Let's breakdown the complete file
image: alpine:latest

before_script:
  - apk add --no-cache openssh lftp

build:
  script:
    - mkdir /root/.ssh
    - chmod 700 /root/.ssh
    - touch /root/.ssh/known_hosts
    - chmod 600 /root/.ssh/known_hosts
    - ssh-keyscan -p $SFTP_PORT -H $SFTP_HOST >> /root/.ssh/known_hosts
    - lftp -e "mirror --delete --parallel=5 --transfer-all --reverse -X .* --verbose website/ /var/www/html; bye" -u $SFTP_USER,$SFTP_PASSWORD sftp://$SFTP_HOST -p $SFTP_PORT

  only:
    - main
As you can see, the commands are split in two sections and a few other lines are added.
First line is the image we have chosen. I use alpine with the :latest tag. You should use a fixed version in production.
DO NOT USE LATEST IN PRODUCTION !!! JUST FOR TESTING
The before_script section contains the command to prepare the image before his use. Of course, the installation part of the software is done there.
The build section contains what I would describe as the computationally interesting part. It's called build because it's in this part that you would do the compilation process.
It contains the script section, it's quite obvious what that part does, it's all the commands to build the software.
It also contains the only section. You'll define there in which branch the commit will result in the job being executed. In this example, at every commit to the main branch, the job is executed.
Variables
Now on the last part to finalize our set up of Gitlab. The variables !
So, go to your Gitlab instance, open your project then go to Settings > CI/CD. There's a section called Variables which is collapsed by default. Click on Expand.
It's just a matter of clicking on Add Variables, entering the name of the variable in Key then putting the data we want to pass through in Value and finally clicking on Add Variable
The name inkeyis what it'll be used in the script preceded by$
Check Mask variable for the password variable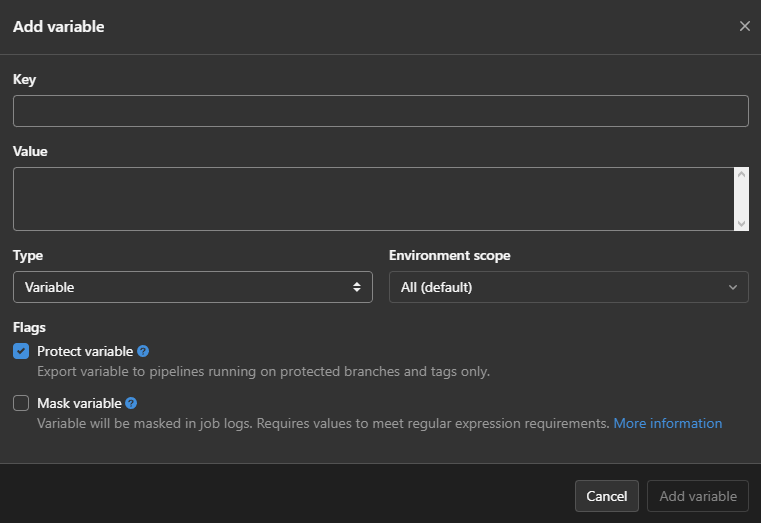
In this example, we need:
- the address of the server (SFTP_HOST)
- the port used by SFTP (SFTP_PORT)
- the user used for connection (SFTP_USER)
- the password of the user (SFTP_PASSWORD)

Commit!
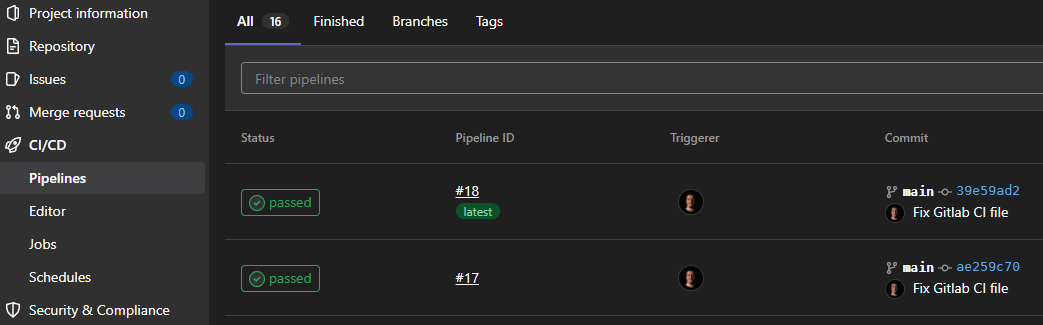
Now, everything is ready. At the next commit to the correct branch, you'll be able to see the jobs running in the CI/CD page of your project.
If you click on the status of the pipeline, you'll be able to get more info.
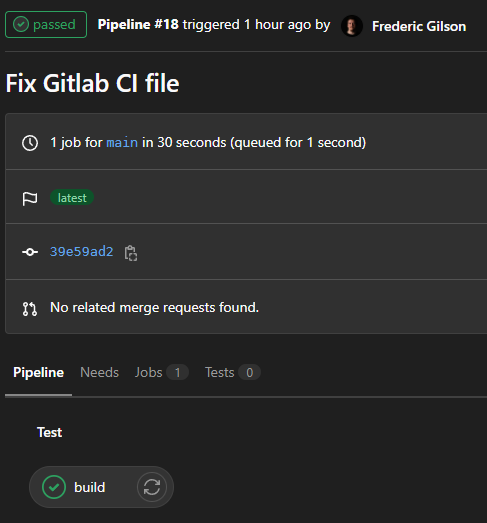
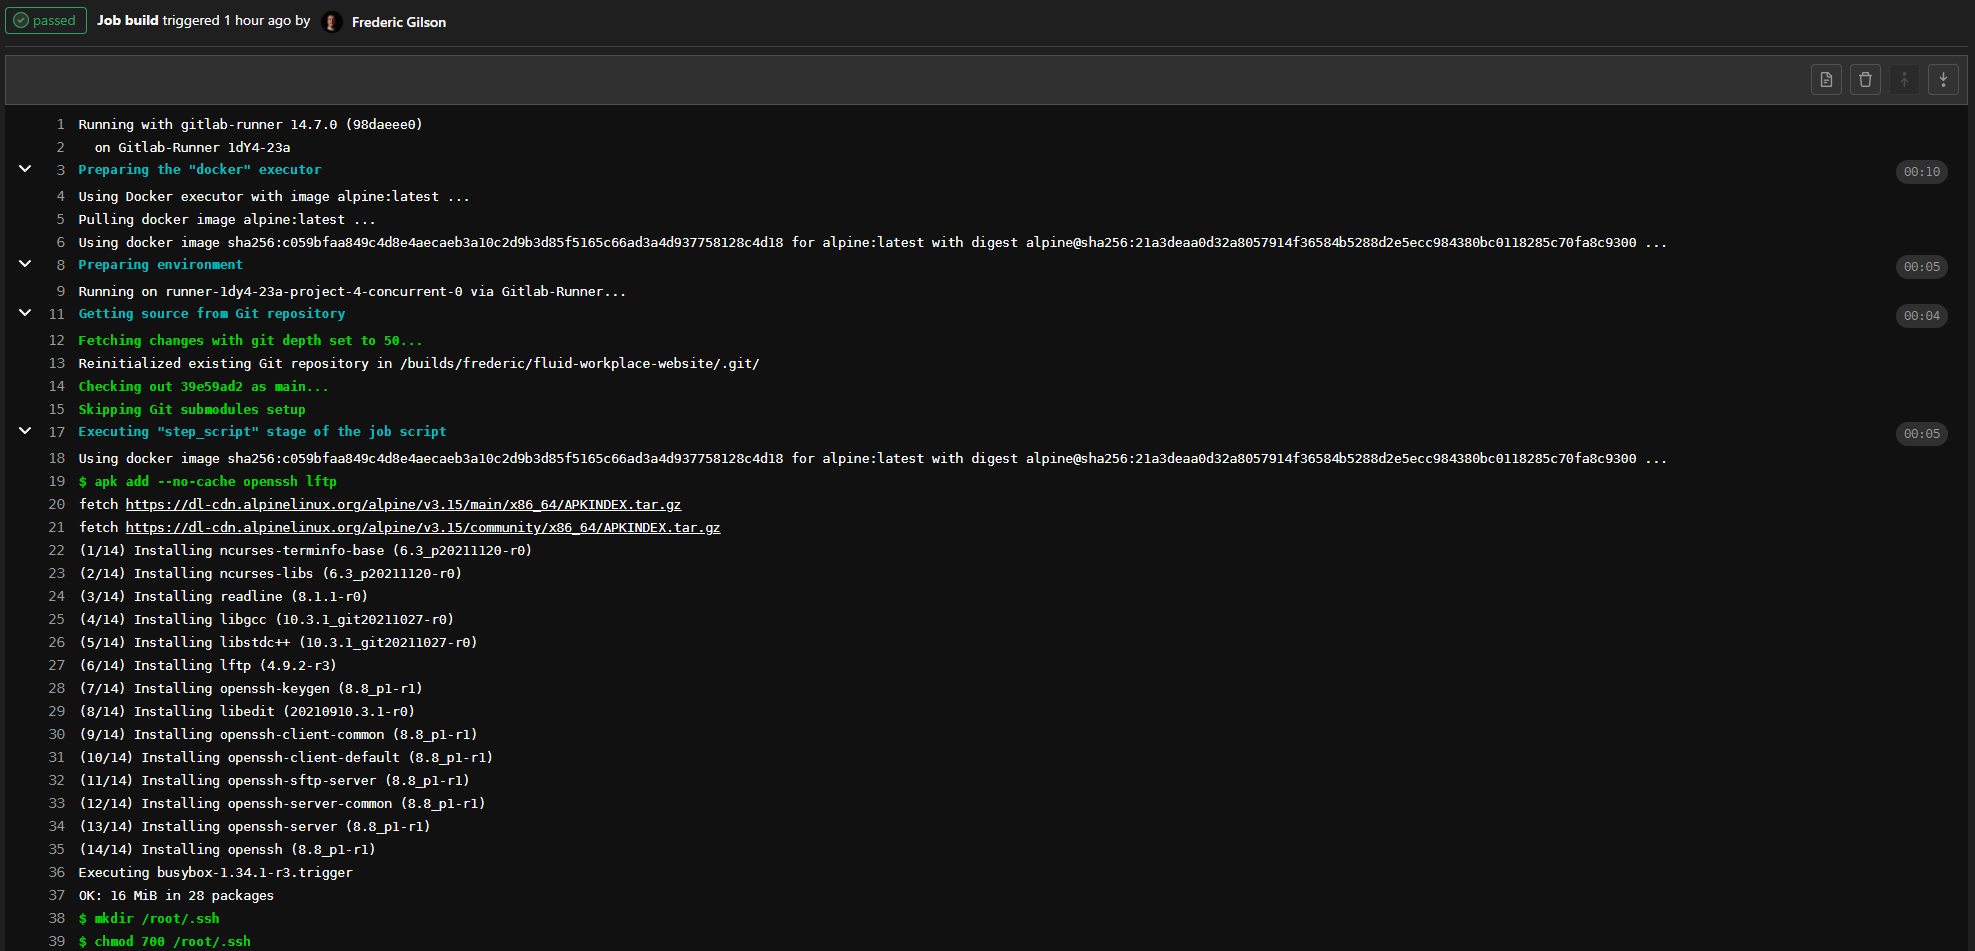
Then, if you click on the bottom button named after the section in our yaml file, you'll get the output of the job.
That's it! If you have any questions or comments, do not hesitate to contact me. Now it's time to start developing with a little bit less of hassle!